This is a Draft Article
I just want to share my experience related to the migration from NNMi using local DB (postgress) to NNMi using Oracle DB
System was as specified:
NNMi 9.00 with Patch 1
Same Machine hosting the Embedded database (postgress)
Objective:
Migrate the configuration data to NNMi and Oracle Database.
Step X Backup NNMi for disaster recovery
nnmbackup.ovpl –type offline –scope all –force –archive –target c:
a file with tar extension will be created on drive c: started nnm-bak- and the current date and time .tar like nnm-bak-20100721183731.tar
Extra-Step X Backup any custome scripts you created for Incident actions.
%NnmDataDir%sharednnmactions
aslo these files can be found under your backup archive
nnm-bak-20100721183731.tarnnm-bak-20100721183731datasharednnmactions
Step X Backup you configuration (configuration Export)
in this step we will export the configuration using nnmconfigexport.ovpl
nnmconfigexport.ovpl –c all –file c:exportedconfig
Hint: the export export remember to create the folder before run the above command “mkdir c:exportedconfig”
Step X export Nodes as seed file
Step X Remove current NNMi installation
1st – Remove i-SPI
2nd – Remove Patches
3rd – Remove NNMi
Restart your server.
Step X Oracle configuration
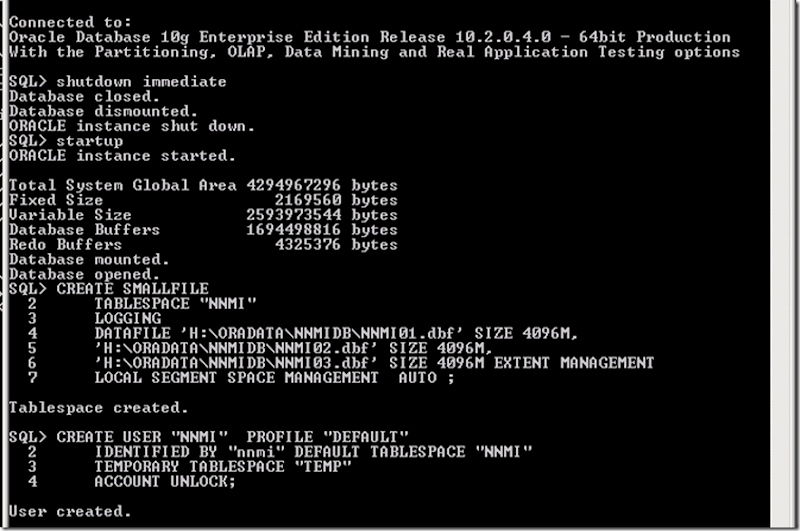
In this section we will create the table space that will hold the NNMi database that will be created during NNMi installation.
Section 1: Create Tablespace
CREATE SMALLFILE
TABLESPACE “NNMI”
LOGGING
DATAFILE ‘H:ORADATANNMIDBNNMI01.dbf’ SIZE 4096M,
‘H:ORADATANNMIDBNNMI02.dbf’ SIZE 4096M,
‘H:ORADATANNMIDBNNMI03.dbf’ SIZE 4096M EXTENT MANAGEMENT
LOCAL SEGMENT SPACE MANAGEMENT AUTO
Section 2: Create NNMi User
CREATE USER “NNMI” PROFILE “DEFAULT”
IDENTIFIED BY “nnmi” DEFAULT TABLESPACE “NNMI”
TEMPORARY TABLESPACE “TEMP”
ACCOUNT UNLOCK;
 Section 3: Assign Permissions for NNMi User
GRANT CREATE ANY INDEX TO “NNMI” ;
GRANT CREATE ANY SEQUENCE TO “NNMI” ;
GRANT CREATE ANY TABLE TO “NNMI” ;
GRANT CREATE ANY VIEW TO “NNMI” ;
GRANT CREATE SEQUENCE TO “NNMI”;
GRANT CREATE SESSION TO “NNMI” ;
GRANT CREATE TABLE TO “NNMI” ;
GRANT CREATE VIEW TO “NNMI” ;
GRANT FLASHBACK ANY TABLE TO “NNMI” ;
GRANT “CONNECT” TO “NNMI”;
GRANT “OEM_ADVISOR” TO “NNMI”;
GRANT “RESOURCE” TO “NNMI”;
Step X Install NNMi 9.x
Install using the installation guide.
Step X Load old node list a seed files
Step X Load Node Groups and Maps information
1- load Nodegroup Map configuration
loading Nodegroup Map configuration will fail as per the screenshot but some required identification are imported that facilitate the nodegroup import
D:Program Files (x86)HPHP BTO Softwarebin>nnmconfigimport.ovpl -f C:export
edconfigngmap.xml
2- Load nodegroup configuration
D:Program Files (x86)HPHP BTO Softwarebin>nnmconfigimport.ovpl -f C:export
edconfignodegroup.xml
Successfully imported nodegroup.xml.
3- load Nodegroup Map Configuration again
D:Program Files (x86)HPHP BTO Softwarebin>nnmconfigimport.ovpl -f C:export
edconfigngmap.xml
Successfully imported ngmap.xml.
